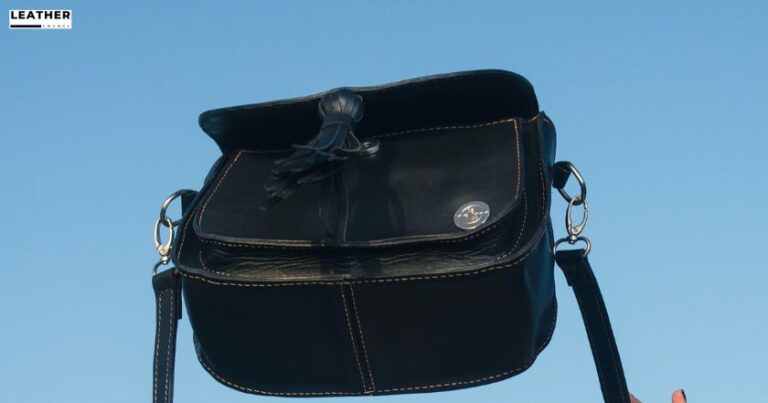
How To Fix Stitching On Leather Bag? Explained in 7 Best Steps
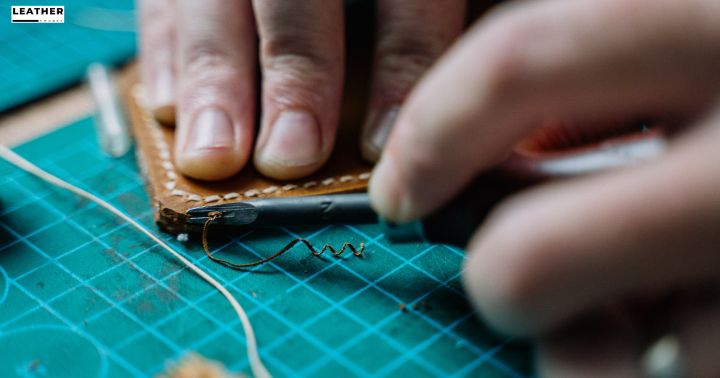
Are you dealing with a loose stitch in your leather bag? If so, don’t stress! You can fix it yourself with a few simple steps.
To fix the stitching on leather bags, start by using cream for leather repair, a microfiber cloth to clean it with, and some leather repair lotion.
In this article, you’ll learn how to fix stitching on leather bag in 7 steps, prevent fraying of the leather, and get some helpful tips along the way.

Jump to a Specific Section
- 1 Summary
- 2 How to Repair a Loose Stitch in Your Leather Bag? 7 Steps to Follow
- 3 How do You Prevent the Leather from Fraying?
- 4 Final Thoughts
- 5 Frequently Asked Questions
- 5.1 What Type of Needles Should I Use for Leather Stitching?
- 5.2 What’s the Best Way to Clean and Maintain a Leather Handbag?
- 5.3 How Do I Choose the Best Thread for Leather Repairs?
- 5.4 What should I do if the leather corners of my bag are peeling?
- 5.5 Can I use a regular sewing needle to repair the stitching?
- 6 Resources Used for Research
Summary
- Use cream for leather repair to restore the color, soften the leather, and fill cracks and gaps in stitching for durability.
- Clean the leather’s surface regularly with a microfiber cloth to prevent damage and maintain the bag’s condition.
- Apply leather repair lotion directly onto the stitching, massage it in, and allow the bag to dry completely before re-stitching if necessary.
- When repairing damaged leather handbags, clean the affected area, cut leather tabs, make small punctures along the rip, thread a needle through each side, and secure the tab with glue to let it dry.
How to Repair a Loose Stitch in Your Leather Bag? 7 Steps to Follow
You’ll need a few items to repair the loose stitching, including cream for leather repair, a microfiber cloth to clean it with, and some leather repair lotion.
To get started, follow these 7 steps:
Things You’ll Need
Before you can fix the stitching on the leather bag, you’ll need a few supplies. A helpful table to keep in mind is as follows:
| Item | Description |
|---|---|
| Leather Bag | The piece of leather that needs to be repaired. |
| Needle & Thread | Stitching repair tools are used to sew together pieces of fabric or leather. |
| Glue/Adhesive Tape/Patches | Useful for repairing larger holes and tears in the material. These can also help strengthen weak seams. |
Having these items handy will make your stitching repair process much easier and more successful.
1. Using Cream for Leather Repair
Using a leather repair cream is an effective way to condition the material and increase its longevity. It can help restore the original color of the leather, as well as soften and protect it from further damage.
A good quality leather repair cream will also fill in any cracks or gaps in the stitching, helping to reinforce them for greater durability.
When applying the cream, use a small amount and massage it into the damaged area with your fingers until it’s completely absorbed.
If you have excess baby oil or other liquid lubricants, these can be added to the leather repair cream for an extra boost of hydration.
To reinforce any loose stitching thread on your bag, apply some leather glue along with additional stitching thread when necessary.
2. Use a Microfiber Cloth
This is especially important when attempting a leather repair job, such as fixing stitches on a handbag. Using a traditional cleaning cloth can be too abrasive and damage the material further.
Microfiber cloths are soft and non-abrasive, perfect for the safe and effective cleaning of leather surfaces.
When you’re ready to begin stitching the leather bag back together, make sure the surface is free of dirt or dust particles that may have collected over time.
If these particles aren’t removed first, they can affect the quality of the stitch repair and possibly even cause further damage to your leather handbag.
3. Using leather Repair Lotion
Once the area is free of dirt and dust, applying leather repair lotion can help ensure a successful stitch repair.
To use it, you will need to:
- Carefully apply the lotion directly onto the stitching
- Gently massage it into the threading with your fingertips
- Allow the leather bag to dry completely
- Re-stitch if necessary, using a matching thread color
- Use a small brush or cloth to remove any excess residue from the surface.
Leather bags are delicate and require special care when repairing stitching; however, with the proper use of leather repair lotion, you can restore them back to their original condition.
4. Cover the Leather Bag with a Cotton Cloth
To do this, lay out the cloth on a flat surface and place the bag in the middle of it.
Make sure that all sides are equal so that you can fold over the sides neatly. Secure each side with either a leather needle and thread or glue if available.
Once done, go back to the seam where you fixed it and make sure everything is still intact before proceeding further.
The cotton cloth will help protect your repaired area from any dust particles or dirt settling into it while it air drys.
5. Let the Leather Bag Air Dry
This is an important step in fixing stitching on a leather handbag or purse. Air drying allows moisture to evaporate, which reduces the chances of further damage from water.
It also helps maintain the shape and structure of the bag’s leather strap or handles.
Here are a few tips to consider when air-drying your leather handbag:
- Avoid direct sunlight as it can cause discoloration and make the leather brittle.
- Hang the bag upside down so that any moisture will move away from its pockets and seams.
- Place a fan close to the hanging bag, but not directly blowing on it, to speed up evaporation.
- Turn the bag around every couple of hours if possible, so that all sides have an opportunity to dry evenly.
- Use cedar wood blocks inside compartments of bags with loose stitching, as they absorb excess moisture while preventing mold growth.
Once completely dried out, you can now wipe it down with a clean towel before moving on to other repair steps for your leather handbag stitching.
6. Wipe it Down with a Clean Towel
Doing this will help preserve the stitching, prevent it from coming loose, and keep the bag looking its best.
It’s important to be gentle when wiping down the leather bag so you don’t damage or stretch any of the stitches.
| Table | Table |
|---|---|
| Bag Stitching | Keep it Looking Its Best |
| Loose Stitch | Prevent From Coming Loose |
| Stitching on a Leather Bag | Be Gentle When Wiping Down |
| Repair a Loose Stitch | Don’t Damage or Stretch Any of The Stitches |
| Wipe it Down With A Clean Towel | Preserve The Stitching |
Using a clean towel is an effective way to wipe away dust and dirt from the leather bag that can accumulate over time and cause damage to the stitching if left unchecked.
7. Apply the Leather Conditioner
To protect the bag further, apply a leather conditioner. Rub it onto the stitches and the entire surface of the bag with a soft cloth or tab until it is evenly distributed.
Make sure to cover all areas, including straps and lining, as this will help prevent future fraying.
After conditioning:
- Re-stitch any loose seams
- Protect against water damage
- Avoid over-drying or stretching the leather
- Apply more conditioner when necessary to keep the material from drying out and cracking.
How do You Prevent the Leather from Fraying?
You may have recently encountered a loose stitch in your handbag that needs repair.
To prevent this from occurring again, it is important to understand the correct way of stitching leather and faux leather when making repairs.
With the right technique, you can easily sew through these materials while preventing fraying and further damage to your bag.
a. Loose Stitching & Thread
If you notice any loose stitching or threads, it’s important to take steps to fix them quickly.
If the bag is made of faux leather, thread repair can be done without special tools. For genuine leather, a leather needle and heavy-duty thread are needed.
To sew leather, use an upholstery needle and preferably waxed linen or polyester thread for added strength. A curved needle is also recommended for better results.
To fix loose stitching on your handbag:
- Start by cutting off excess threads with sharp scissors
- Thread a needle with heavy-duty thread
- Use the needle to stitch back through the hole in the fabric
- Secure ends of the threads with knots
- Trim off any excess string from knots
This will ensure that your handbag stays looking great while preventing further fraying and damage caused by loose stitching or threading.
b. Handbag Stitching Repair
To do this, start by carefully peeling away any loose threads. Then, use a needle and thread to re-stitch the area, making sure that the stitches are tight enough so that they don’t come apart again.
If there is any tearing in the leather itself, you can also use glue to seal it. Make sure that you use a special glue designed for leather, regular craft glue won’t work as well and could discolor or damage your bag.
Once everything has been fixed up and tightened down again, your bag should be as good as new.
c. Repairing leather handbags
To start, remove any dirt and stains from the affected area of the bag using a damp cloth and some rubbing alcohol.
Next, cut two pieces of leather tabs in the same shape as the ripped part, making sure to leave enough room for stitching.
Using an awl, make small punctures along both sides of the rip before threading a strong leather needle through each side.
Finally, use your preferred glue to secure the tab over the rip and let it dry overnight. With these steps, you’ll have your once-damaged bag looking like new again.
d. How To Sew with Faux Leather
Sewing with faux leather can be tricky, but with the right tools and a bit of practice, it’s definitely doable.
To fix tears or holes in a tote bag made of faux leather, you’ll need a special needle for fake leather, preferably one that is specifically designed for PU leather. You can find these needles online or at craft stores.
Depending on the size of the hole, patching may be an option, as well as using a combination of stitching techniques to secure the edges and repair any damage.
There are numerous ways to fix stitching on faux leather bags, and with careful attention to detail, you can make your bag look as good as new again.
Final Thoughts
You’ve now learned how to repair a loose stitch in your handbag, as well as tips on how to prevent the leather from fraying.
With these steps in mind and with the right supplies, you can easily fix those loose stitches and maintain the look of your bag.
Take your time when stitching and be careful not to make any mistakes. Following these steps will help ensure that you can keep using your handbag for years to come.
Frequently Asked Questions
What Type of Needles Should I Use for Leather Stitching?
You should use a curved needle specifically designed for leatherwork. This type of needle is stronger and its curved shape helps the thread pass through the material more easily.
What’s the Best Way to Clean and Maintain a Leather Handbag?
Clean your leather handbag regularly with a soft, damp cloth. Avoid harsh chemicals and choose a mild soap if necessary.
How Do I Choose the Best Thread for Leather Repairs?
Choose a thread that is UV-resistant and designed for leather repairs. Consider its durability, strength, and color to ensure it matches your bag’s material and design.
What should I do if the leather corners of my bag are peeling?
If the leather corners of your bag are peeling, you can use a leather adhesive or contact a professional leather repair service for assistance.
Can I use a regular sewing needle to repair the stitching?
It is recommended to use a leather needle for stitching on leather, as it is specifically designed for this purpose.

