How to Dye Vegetable Tanned Leather? 9 Best Ways
Do you want to give your vegetable-tanned leather a beautiful, unique look? Dying your veg tan leather is an easy way to create a custom design that will make it stand out.
With the right tools and knowledge of the process, you can quickly and effectively dye your leather with professional results.
In this article, we’ll cover everything you need to know about how to dye vegetable tanned leather, from what supplies are needed, how to prepare your material for dying, and more.
Jump to a Specific Section
- 1 Key Takeaways
- 2 What is Vegetable-Tanned Leather?
- 3 Tools You’ll Need to Dye Your Leather
- 4 How to Dye Vegetable Tanned Leather? 9 Ways to Follow
- 5 Best Environment for Dying Veg Tan Leather?
- 6 Types of Dyes Used to Dye Leather
- 7 How to Stop Vegetable-Tanned Leather Dye from Bleeding
- 8 Additional Tips and Tricks
- 9 Conclusion
- 10 Frequently Asked Questions
- 10.1 How Long Does Vegetable-Tanned Leather Take to Dry?
- 10.2 Is Vegetable-Tanned Leather Durable?
- 10.3 Does Vegetable-Tanned Leather Require Special Care?
- 10.4 Are There Different Types of Vegetable-Tanned Leather?
- 10.5 Can Vegetable-Tanned Leather Be Painted?
- 10.6 What is vegetable-tanned leather?
- 10.7 Why would I want to dye vegetable-tanned leather?
- 10.8 What are the different ways to dye vegetable-tanned leather?
- 10.9 How do I apply the dye to vegetable-tanned leather?
- 10.10 Can I dilute the dye for a lighter color?
- 10.11 What kind of dye should I use for vegetable-tanned leather?
- 10.12 How can I achieve a muted or antique finish on the leather?
- 10.13 Will dyeing interfere with the natural properties of vegetable-tanned leather?
- 10.14 Can I change the color of the leather that has already been dyed?
- 10.15 Is dip dyeing a good option for coloring vegetable-tanned leather?
- 11 Resources Used for Research
Key Takeaways
- Vegetable-tanned leather is tanned using natural ingredients, creating a durable and high-quality material.
- Proper preparation is crucial, including cleaning the leather and allowing it to dry completely before dyeing.
- Different techniques, such as diluting the dye and using various applicators, can be used to achieve desired results.
- Additional techniques and tips include using airbrushing, coffee dye, lemon juice, and creating a suitable environment for dyeing veg tan leather.
What is Vegetable-Tanned Leather?
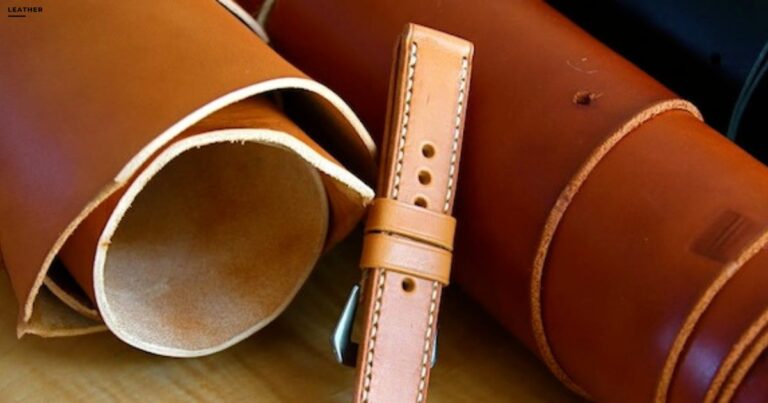
You may be wondering what vegetable-tanned leather is; it’s a type of leather that has been tanned using natural ingredients. Veg tan leather, as it is often called, is created through the process of soaking the hide in a combination of tree bark and other plant-based matter.
This method creates a chemical reaction that binds the proteins together to make them more durable. Vegetable-tanned leather takes longer than chrome-tanned hides but produces higher-quality results with an unmatched look and feel.
It also allows for greater versatility and range when you dye vegetable-tanned leather because of its unique ability to absorb dyes effectively. The end result is a product that looks beautiful and will last for years to come.
With proper care, veg tan leather can age gracefully and develop an even more gorgeous patina over time. As you can see, vegetable-tanned leather has many advantages compared to other types of leather making it ideal for dyeing projects that require precision and longevity.
Tools You’ll Need to Dye Your Leather
To dye your leather, you’ll need certain tools: first, the type of dye that works best for vegetable-tanned leather. You’ll also need a way to apply the dye. This could range from a spray bottle or paintbrush to more professional techniques like airbrushing.
In addition, you’ll need some additional items such as rags for cleaning and applying the dye, gloves for protection from any harsh chemicals in the dyes, and paper towels to wipe away any excess moisture before it dries.
Next, you’ll want to consider ways to protect your work surface so that any spilled dye isn’t absorbed into the material below. Plastic sheets are a popular option but newspapers can work too if needed.
Finally, having a well-ventilated area is important when working with dyes since they may contain strong odors and fumes that you won’t want lingering around once your project is finished.
Having all these tools at hand will help ensure success when trying to achieve beautiful results with dyed vegetable-tanned leathers. With them in place, you’re ready to start exploring different colors and finishes that will make your project truly unique.
How to Dye Vegetable Tanned Leather? 9 Ways to Follow
Preparing vegetable-tanned leather for dyeing involves cleaning, deglazing, and moisturizing the hide. To dilute your chosen dye, mix it with distilled water or rubbing alcohol in a glass container.
You’ll need wool daubers to apply the dye evenly over the surface of the leather. Using a sponge you can enhance luster or create an antiqued look by brushing on multiple layers of appropriate colors.
If you’re looking for precise coverage, block dyeing is an effective approach that requires using rubber blocks to strategically press and roll color onto specific areas of your leather piece.
Preparation
Before dyeing vegetable-tanned leather, it’s important to clean the surface thoroughly. Preparing the leather requires a few specific steps:
- Preconditioning: This step helps to soften and prep the leather so it can absorb the dye. Use neatsfoot oil or a similar conditioner and massage into the surface with a soft cloth.
- Cleaning: Wipe down your piece with isopropyl alcohol or saddle soap to remove any dirt or impurities that may prevent even saturation of color.
- Drying: Let your piece dry completely before moving on to dyeing.
These preparatory steps are essential for learning how to dye veg-tanned leather successfully; they’ll help ensure even absorption of color and create an overall better-looking finish.
Taking the time for proper preparation is worth it in order to achieve professional results when dying your vegetable-tanned leather project.
Diluting Dye
Mixing a diluted dye solution is the next step in creating your finished look. When you dye your leather, it’s important to dilute the dye with water to ensure even coverage and consistent color.
There are different ways to dye leather, but this method of using a diluted solution ensures that your veg-tanned leather is evenly colored when you apply the leather dye. Diluting the dye can be done manually, or by using a spray bottle which allows for more precise application and control over how much of the solution is used.
By ensuring that the correct amount of liquid is added, you can create a beautiful finish on your leather project while avoiding messes and uneven coloring. Once prepared, you’re ready to start applying the dyed leather – no need for any additional steps.
Wool Daubers
Now that you’ve diluted your dye, it’s time to start dyeing the leather. Wool daubers are a great tool for applying both water-based and oil-based dyes to vegetable-tanned leather. Here are some tips on how to use them:
- Water-Based Dyes:
- Soak the wool dauber in warm water before dipping it into the dye solution.
- Apply even coats of dye until the desired color is achieved.
- Oil-Based Dyes:
- Dip the wool dauber into the oil-based dye and apply it evenly.
- To darken areas further, add more layers of dye with additional dabbing from the wool daubers.
Try out these techniques when you’re ready to begin dyeing your veg tan leather, each will help ensure an even distribution of color throughout your project.
Sponge
Sponges are another great tool for applying dye to your project, allowing you to create a marbled effect with oil-based dyes. It’s easy to use and allows you to dye the leather in different ways.
A sponge is a porous material that can be used to hold and apply oil dye onto the surface of the leather. All you need to do is saturate the sponge with your desired color of oil dye, then simply dab it onto the leather in various locations.
This will give you an interesting pattern on the surface of your item as each dab will absorb differently into the leather. Plus, if there are any areas that need more coverage, just re-apply more dye as needed until you achieve your desired look.
You can also use sponges to create specific patterns or shapes by drawing directly onto them before pressing them onto the leather. With sponges, you have endless possibilities for creating unique designs on vegetable-tanned leather.
Block Dyeing
Try block dyeing for a unique look on your project – it’s an easy way to apply oil-based dyes and create interesting patterns. The process of block dyeing is a great option for veg tan leathers that have already been dyed or tanned.
It’s simple, yet effective: you’ll start by applying the dye on the leather with a foam brush, then follow up with a wooden block to press the dye into the grain of the leather.
This will result in an even distribution of color and help create beautiful patterns. If you’re new to dying leather, this is an excellent option as it provides more control over where and how much of the dye is applied so you can get just the right tan you desire.
With careful attention to detail during this step in the dying process, your leather projects are sure to stand out. Block dyeing offers plenty of opportunity for creativity and experimentation, let your imagination shine.
Paintbrush
Using a paintbrush is another great way to apply the dye and create interesting patterns on your leather project. Choose a brush with natural bristles that will not shed, which should also be labeled for use with the dye solution you are using.
If you’re working with vegetable-tanned leather, make sure to prep it first by cleaning the surface and applying a leather finish. Once everything is ready, mix up the dye solution according to the package directions. Dip your brush into the mixture and carefully apply it to the leather in desired pattern or design.
Be sure to work quickly since the dye will start drying as soon as it touches the material – so if you need more time, you can always re-wet sections of the piece with an additional dye solution.
Airbrushing
Airbrushing is a great way to add additional detail and texture to your leather project. It is an effective way of adding dye to the leather while also being able to achieve unique patina effects. With airbrushing you can:
- Create beautiful designs on the leather
- Include intricate details with paints, dyes, and inks
- Achieve a unique finish
- Use mink oil or other oils for a desired effect The drying process will vary depending on the type of veg tan leather you are using, so make sure to follow the instructions carefully. Airbrushing can be time-consuming but it’s worth it when you create something special.
With Coffee
Coffee can be used to add an extra layer of protection to your leather project, giving it a unique and beautiful patina. Dyeing vegetable-tanned leather with coffee is a great way to make the veg tan leather look even better.
To start, you should always ensure the leather has been correctly prepared and tanned before dyeing. Apply the coffee dye throughout the entire piece of leather, allowing it to soak for several minutes before wiping off any excess liquid. Once dry, give the piece one last coat of wax or sealant for added protection.
This will help preserve both its original color and the new patina created by the coffee dye. The result is a beautiful finish that will stand out from other pieces of leather thanks to its unique color.
With Lemon Juice
Lemon juice is another great way to give leather an interesting patina and unique color. To dye veg tan leather with lemon juice, you’ll need:
- Unfinished leathers that take the dye
- Lemon juice
- Q-tips to apply the dye
- Leather conditioner
- Water-based dye Using Q-tips, saturate the unfinished leather with lemon juice. Allow it to dry overnight. Then use a water-based dye to get your desired color. Make sure you condition the leather after dying for extra protection and shine.
Dying veg tan leather with lemon juice can provide a great result – natural but also unique in terms of color and patina. With the right technique, one can achieve amazing results that will last over time.
Best Environment for Dying Veg Tan Leather?
If you’re getting ready to dye veg tan leather, it’s important to make sure you have the right environment for the job. You’ll need an ideal surface to work on, a well-ventilated area, and the right temperature.
Preparing this environment is key for achieving perfect results when dying veg tan leather, so take your time and get it right.
An Ideal Surface
For the best results, it’s important to ensure that the vegetable-tanned leather surface is smooth and clean before applying any dye. To achieve an ideal surface, consider using a few different treatments:
- Jojoba oil: This natural oil will help keep the leather soft and pliable while also providing a light water-resistant finish.
- Resolene: This finish is perfect for creating a muted or antique look on your leather project.
- Neatsfoot oil: Use this traditional product to protect the leather from moisture and wear and tear over time.
- Chrome-tanned leathers may require additional treatment prior to dying in order to achieve desired results.
Applying these treatments correctly will give you a good foundation upon which dye can be applied for vibrant colors and long-lasting finishes.
Well-Ventilated Area
Now that you have the ideal surface, it’s important to make sure you’re working in a well-ventilated area. This is especially important if you are using oil-based dyes as they can produce hazardous fumes. To ensure your safety, take the following steps:
| Step | Description | Tips |
|---|---|---|
| Do Work Outside or in an Open Garage/Workshop | If possible, work outside or in an open garage/workshop with plenty of ventilation and no heat sources nearby. | Make sure you have a flat and stable surface for working on. Avoid windy days for best results. |
| Wear Protective Gear | Before starting any dyeing process, be sure to wear gloves and safety goggles to protect yourself from any splashes or spills during application. | Choose protective gear that is comfortable but also effective when it comes to protecting yourself from harm. |
| Use Fans/Extractor Hoods | Set up fans or extractor hoods near your work area for better air circulation and proper disposal of fumes through extraction systems. | Consider purchasing high-quality fans/extractor hoods that will last longer and provide better protection against hazardous fumes. |
With these tips in mind, you should now be ready to begin learning how to dye vegetable-tanned leather – just remember that temperature plays an important role too.
Right Temperature
It’s important to make sure you’re working at the right temperature when creating your project. Leather dye will set much faster in higher temperatures, so it’s best to work in an area that is comfortable and not too hot.
When Dyeing With Water:
- Make sure the water is lukewarm; anything hotter than a light coat of neatsfoot oil can cause damage to the leather fibers
- Hydrate the leather before applying dye for better results and longer-lasting colors
When Dyeing With Oil:
- Use warmer water for better absorption of colorants; warm temperatures encourage faster penetration into the leather fibers
- Be careful when using heat sources like hair dryers or lamps as they may cause discoloring or burning of leather
When done correctly, vegetable-tanned leather should always come out looking beautiful and vibrant. With just the right temperature, you can create stunning projects with ease.
Types of Dyes Used to Dye Leather
Leather dyeing is an interesting and rewarding process, and the type of dye you use can make a big difference in the outcome. There are three main types of dyes used for leather: oil-based, water-based, and alcohol-based. Each has its own advantages and disadvantages depending on what kind of look you’re going for.
Oil-based dyes offer deep color intensity but require more attention during application to avoid discoloration or unevenness; water-based dyes are great for small projects due to their quick drying time; alcohol-based dyes are best used sparingly as they may cause fading when overused.
Using Oil-Based Dyes
Oil-based dyes are commonly used to dye vegetable-tanned leather. It’s an easy and effective way to achieve the desired color for any leather bag, wallet, or finished leather product.
- Benefits:
- Easy to use
- Long-lasting result
- Requirements:
- Oil-based dyes
- Waterproofing wax or sealer
Using Water-Based Dyes
Water-based dyes are an alternative way to color your finished leather product that doesn’t require the use of oil-based dyes. Pro dye is a popular water-based dye that comes in many colors, and it’s easy to apply with a foam brush.
To prepare for dying, you’ll also need a dye reducer and alcohol-based cleaner. A water-based dye needs to be activated with heat, so work in a well-ventilated area and wear gloves as you hydrate the leather first using clean water.
Let the leather dry completely before applying the pro dye evenly across the surface. Once it’s applied, heat set it with a hot air gun or blow dryer until the desired color is achieved. Finally, apply a protective finish if desired.
Alcohol-Based Dyes
Alcohol-based dyes provide even more vibrant color to your finished leather product than oil-based or water-based dyes. To achieve this, you can use a variety of alcohol-based dyes like Fiebing’s Leather Dye. When applying the dye, make sure to evenly coat the leather so that it absorbs and is completely saturated with the color.
You can then apply more layers of dye until you reach the desired color of the leather. It’s important to remember that with alcohol-based dye, it will need time to dry in between applications in order for it not to bleed into other areas. From there, you will be able to enjoy your new and colorful vegetable-tanned leather product.
How to Stop Vegetable-Tanned Leather Dye from Bleeding
To keep the vegetable-tanned leather dye from bleeding, you’ll need to use a sealer that won’t wash away. Dip dyeing is one of the most popular methods for coloring tanned leather, but when it comes to natural vegetable-tanned leather, saturation matters.
You don’t want too much color and not enough sealer as this could cause your dye to bleed through the fibers of the leather. Instead, make sure that you have an even mix of both so that every bit of your leather is saturated with color and sealed properly.
This will ensure that the color stays put without any bleeding or fading over time. If you’re unsure how much sealer to use for optimal results on your natural vegetable-tanned leather, consult a professional who can provide advice based on experience with these fabrics.
And remember: no matter what type of fabric you’re working with, always test out any new colors or techniques in an inconspicuous spot before diving in. With these tips in mind, you can confidently create beautiful dyed pieces knowing they will look just as beautiful after washing as they did when first created.
Additional Tips and Tricks
For the best results, it’s important to consider using additional tips and tricks when coloring tanned fabrics. Here are some key points to keep in mind:
- Wear gloves: Wearing protective gloves can help ensure that your hands don’t get stained by the dye.
- Dye dry: Make sure that you let the leather dry completely before applying the dye. Keeping it too wet can cause the dye to bleed and ruin the finished product.
- Keep the dye contained: To prevent any bleeding or smudging of your design, use a brush or palette knife to apply the dye and keep it within its intended area.
- Leather can help: Treating leather with a conditioner or wax before dying can help seal in color and prevent fading over time.
Conclusion
You now have all the knowledge and tools you need to successfully dye your vegetable-tanned leather. Remember to choose a high-quality, water-based dye for the best results. Don’t forget that dying in a warm, dry environment is ideal for achieving optimal color saturation.
If your dye bleeds, use a sealant or wax to protect the color from fading. With these tips and tricks, you’ll be able to confidently create beautiful pieces of dyed leather.
Frequently Asked Questions
How Long Does Vegetable-Tanned Leather Take to Dry?
It depends on the thickness of the leather, but generally vegetable-tanned leather will take a few hours to dry. Make sure you give it enough time to fully dry before continuing with your project.
Is Vegetable-Tanned Leather Durable?
Yes, vegetable-tanned leather is durable. It can last many years with proper maintenance and care. It also stands up well to regular use, making it an ideal material for footwear and other items that will be used often.
Does Vegetable-Tanned Leather Require Special Care?
Yes, vegetable-tanned leather requires special care. You’ll need to condition it regularly and use products specifically made for this type of leather to keep it looking its best.
Are There Different Types of Vegetable-Tanned Leather?
Yes, there are different types of vegetable-tanned leather. Different hides can be tanned with specific oils and waxes, creating unique textures and qualities that affect dyeing results.
Can Vegetable-Tanned Leather Be Painted?
Yes, you can paint vegetable-tanned leather. However, it’s important to use a primer designed specifically for leather prior to painting and to ensure the paint is compatible with the material.
What is vegetable-tanned leather?
Vegetable-tanned leather is a type of leather that is tanned using natural tannins derived from plant sources, such as tree bark.
Why would I want to dye vegetable-tanned leather?
Dyeing vegetable-tanned leather allows you to customize its color and achieve the desired look for your leather projects.
What are the different ways to dye vegetable-tanned leather?
There are various ways to dye vegetable-tanned leather, including dip dyeing, pro dye, and using neatsfoot oil.
How do I apply the dye to vegetable-tanned leather?
To apply the dye, first, clean the leather surface using a clean cloth. Then, using a sponge or a brush, apply the dye evenly onto the leather, making sure to cover all areas.
Can I dilute the dye for a lighter color?
Yes, if you want a lighter shade, you can dilute the dye by adding water or a dilution agent recommended by the dye manufacturer.
What kind of dye should I use for vegetable-tanned leather?
When dyeing vegetable-tanned leather, it is recommended to use dyes specifically made for leather, such as those from Fiebings.
How can I achieve a muted or antique finish on the leather?
To achieve a muted or antique finish, you can apply more dye in certain areas or use techniques like rubbing or distressing the leather after dyeing.
Will dyeing interfere with the natural properties of vegetable-tanned leather?
Dyeing vegetable-tanned leather will not interfere with its natural properties as long as the dye used is of good quality and applied properly.
Can I change the color of the leather that has already been dyed?
Yes, it is possible to change the color of leather that has already been dyed by either applying a new layer of dye or removing the old dye and starting afresh.
Is dip dyeing a good option for coloring vegetable-tanned leather?
Dip dyeing is one of the best options for coloring vegetable-tanned leather, as it allows you to fully immerse the leather in the dye, ensuring an even color penetration.

